Why Snapmaker U1 Makes Multi Color Printing Simpler For Everyday Makers
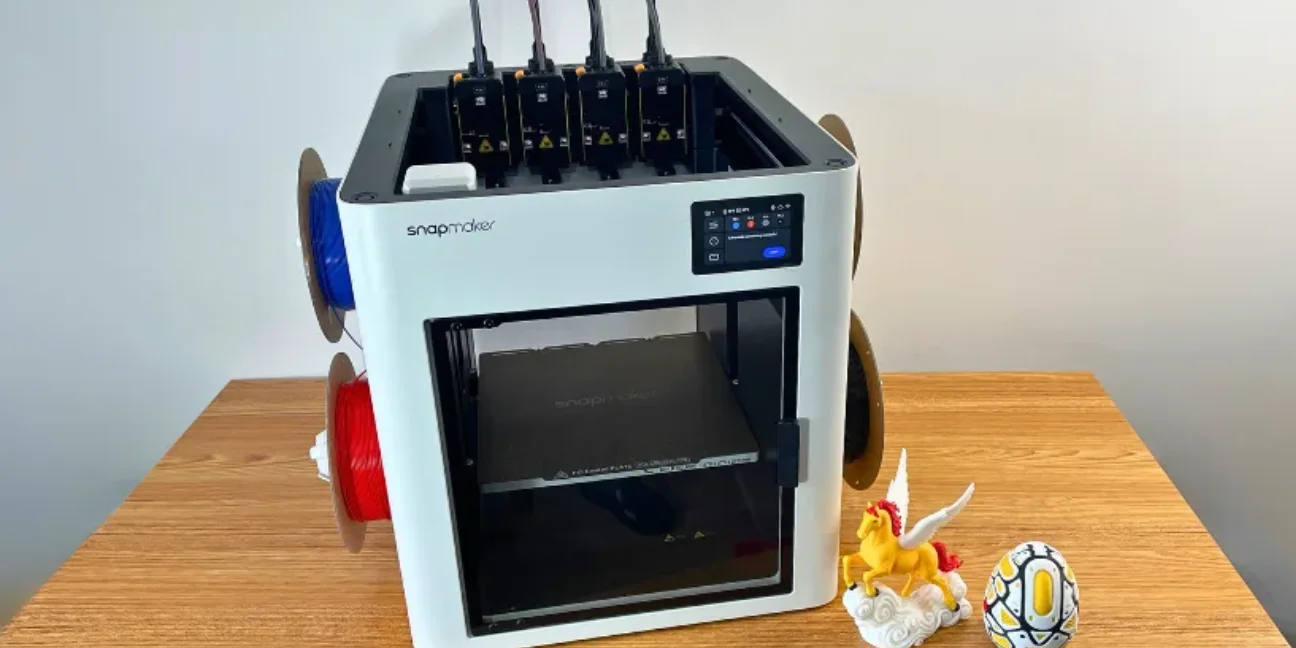
Snapmaker U1 is built around one clear promise, making multi color printing feel less wasteful and less frustrating. Instead of treating color changes as a slow interruption, this printer uses four separate toolheads to keep materials ready.
This review looks at workflow, waste, setup, speed, daily use, and who may find this machine practical.
What Makes Snapmaker U1 Different
Most interest around Snapmaker U1 comes from one practical question. Does a four toolhead system actually make printing easier in real life? Snapmaker says its SnapSwap system changes toolheads in about five seconds, while the printer supports 500 millimeter per second speed and a 270 millimeter cubed build volume.
That matters because multi color printing often becomes slow when one nozzle must purge old filament before a new shade begins. Snapmaker U1 takes a different route by keeping four toolheads loaded, heated, and ready, so less time is spent clearing leftover material.
How Tool Swapping Changes Printing Workflow
SnapSwap is the key reason why people are paying attention to it. Instead of pushing colours through a single nozzle over and over , each toolhead has its own filament route . This can make colour shifts cleaner and more predictable, especially for decorative prints, signage, toys, models and small custom things.
A useful way to judge this machine is by looking at color complexity rather than just color count. A print with many tiny color changes can create far more waste than a model with four large color zones. Snapmaker U1 helps most when frequent switching would normally create long purge cycles.
How Material Waste Affects Daily Printing
Snapmaker says the U1 can utilise somewhere between 17 percent and 47 percent of the filament that some single nozzle colour systems consume under comparable multi colour test settings. That number varies on model size, colour arrangement and slicer settings, thus it should be taken as a reasonable range rather than a promise.
This seems like the place where the machine is most relevant for folks who print colourful stuff often. Less purge waste means less failed looking piles next to finished models, less material loss over time, and less times a little print feels surprisingly pricey.
Real World Printing Experience
Redditers have discussed the U1 as a solid option for low waste multi colour printing, while also emphasising that software maturity and set up expectations are still key. One Reddit post defined it as more for folks who care about quality and repeatability over pure speed benchmarks.
That balanced view is useful. Snapmaker U1 appears strongest when someone wants a cleaner multi color workflow, not when someone expects every advanced print to require no thought at all.
Setup Experience And Learning Curve
Snapmaker has auto filament loading, mesh bed levelling, toolhead offset calibration, vibration compensation and pressure advance calibration. These features require less tuning, especially for customers transitioning from older printers that need constant tuning.
But it still has a competent machine with four toolheads, slicer profiles, materials and calibration algorithms. Guided features may help newcomers to printing, but clean nozzles, dry filament, high adhesion and realistic print parameters are still the best way to get better results.
Print Speed And Everyday Performance
Snapmaker U1 features a CoreXY motion system with acceleration up to 20,000 mm/s2. The Snapmaker Wiki also states that the maximum toolhead speed is 500 millimetres per second allowing for quick movement while trying to preserve quality in the print.
In ordinary use, speed should not be measured by the number of movements alone. The ultimate timing is affected by tool modifications, material type, wall quality, supports and cooling. Reduced purging can save significant time for colourful single objects. Workflow can be different for entire build plates with multiple parts.
Who Snapmaker U1 Fits Best
The Snapmaker U1 is for people who desire colour and material flexibility without having to turn every print into a cleanup session. It's also great for folks who like to experiment with PLA, PETG, TPU, and support materials, but want to keep the process more organised.
If this is your first time purchasing a 3d printer, then you should consider the space, filament storage, software comfort and types of projects you will be doing in the future. U1 weighs 18.2 kilograms, so it has a big desktop footprint, and you’ll want a solid workplace for it rather than a casual shelf.
Creative Hobby Projects
This printer offers the easiest value for the creative user . Colourful models, domestic products, character pieces, accessories, educational printing and decorative prototypes feature faster changeover and less visible waste.
The Snapmaker 3d Printer ecosystem also includes Snapmaker Orca and the Snapmaker App, giving people ways to prepare, monitor, and manage prints. Built in camera support adds convenience for checking progress without hovering beside the printer.
Functional Parts And Prototyping
Functional printing is where multi material support becomes more than a visual feature. Snapmaker U1 can combine materials such as PETG and TPU, while support options like PVA or breakaway support can help with shapes that are difficult to clean by hand.
This does not remove all restrictions. Still softer TPU, enclosed printing requirements, third-party filament behaviour and nozzle material options need attention. Snapmaker said third party 1.75 millimetre filament can work, but RFID recognition won’t operate with anything outside official materials.
FAQs
Is Snapmaker U1 Good For Beginners?
Snapmaker U1 can work for beginners that desire guided features and are eager to learn slicer basics. Auto loading, calibration tools and ready made models help. There may still be a learning curve for those anticipating very effortless huge technical prints.
Does Snap Maker U1 Reduce Filament Waste?
Snap Maker U1 is designed specifically to reduce purge waste during multi color printing. Its four toolhead system avoids much of the repeated flushing used by single nozzle color systems, although actual savings depend on model design and settings.
Can Snapmaker U1 Use Third Party Filament?
Yes, Snapmaker says compatible third party 1.75 millimeter filament can be used when material quality and spool dimensions fit requirements. Official RFID recognition is reserved for supported Snapmaker filaments.
What Makes Snapmaker U1 Different From Standard Color Printing?
The biggest difference is the tool heads are separate. Every loaded material has a different path . Colour changes are not a continual purging , but based on tool swaps . That can make prints cleaner, faster, and less wasteful in proper tasks.
Snapmaker U1 is most convincing when judged by the everyday problems Snapmaker EU set out to solve. Less purge waste, faster color changes, practical calibration, and multi material flexibility give it a clear purpose.
People planning a purchase can also check Snapmaker Promo Codes before they buy to see whether any savings are available.
Follow TheSmartUse for more practical updates on technology and smart product insights.